KitchenAid Mixer Repair Manual: A Comprehensive Guide
This manual offers detailed instructions for maintaining and repairing KitchenAid mixers‚ ensuring longevity and continued baking enjoyment․ It’s a resource for both novice and experienced users!
KitchenAid stand mixers are renowned for their durability‚ often considered “buy it for life” appliances․ However‚ even these robust machines require occasional maintenance and repair․ This section introduces the fundamentals of KitchenAid mixer repair‚ emphasizing that proactive care significantly extends the mixer’s lifespan․ Understanding basic troubleshooting can prevent minor issues from escalating into costly repairs‚ potentially saving you money and baking downtime․
This guide aims to empower owners to confidently address common problems‚ from simple fixes like replacing a drive belt to more complex tasks․ Remember‚ safety is paramount; always disconnect power before commencing any repair work․ We will explore resources like online forums (Reddit r/Kitchenaid) and the official KitchenAid support website for additional assistance․
Understanding Your KitchenAid Mixer Model
KitchenAid mixers come in various models – Artisan‚ Professional‚ Classic – each with unique features and potential repair needs․ Identifying your specific model is crucial for sourcing the correct replacement parts and accessing relevant repair documentation․ The model number is typically located on a plate affixed to the mixer’s base or rear․
Different models may have variations in their internal components‚ such as gear case designs or motor types․ Knowing these distinctions ensures you’re following the appropriate repair procedures․ Familiarize yourself with your mixer’s specific parts diagram‚ often available on the KitchenAid support website‚ to aid in disassembly and reassembly․
Essential Tools for KitchenAid Mixer Repair
Successfully repairing your KitchenAid mixer requires a specific set of tools․ A screwdriver set (Phillips and flathead) is fundamental‚ alongside pliers‚ wrenches (various sizes)‚ and a rubber mallet․ A multimeter is vital for diagnosing electrical issues‚ while a nut driver set simplifies fastener removal․
Specialty tools‚ like a gear puller‚ can be invaluable for certain repairs․ Having a heat gun assists with stubborn parts‚ and a good work light improves visibility․ Always prioritize safety with insulated handles and appropriate eye protection․ Investing in quality tools will make the repair process smoother and more efficient․
Common KitchenAid Mixer Problems & Solutions
This section details frequent issues – power failures‚ motor humming without bowl rotation‚ head “bobbing”‚ and gear case problems – alongside practical‚ step-by-step solutions․
Mixer Won’t Turn On: Troubleshooting Power Issues
When your KitchenAid mixer fails to power on‚ systematically check the power supply․ First‚ ensure the outlet is functioning correctly by testing it with another appliance․ Next‚ inspect the power cord for any visible damage‚ such as cuts or fraying‚ and replace it if necessary․ Examine the mixer’s on/off switch for proper engagement; sometimes‚ it can become faulty․
Furthermore‚ investigate the internal wiring‚ carefully disconnecting power first‚ for loose connections or burnt wires․ A tripped circuit breaker or blown fuse should also be considered and addressed․ If these steps don’t resolve the issue‚ a more complex electrical problem may require professional attention․
Motor Humming But Bowl Not Rotating
A humming motor with no bowl rotation typically indicates a mechanical issue‚ not necessarily a motor failure․ The most common culprit is a broken or slipped drive belt‚ which connects the motor to the bowl drive․ Carefully inspect the belt for wear‚ cracks‚ or detachment․ Replacing a worn belt is often a straightforward fix․
However‚ also check the motor’s coupling and the worm gear for damage․ If the worm gear is stripped‚ it will prevent power transfer․ Ensure nothing is obstructing the bowl’s movement․ If the problem persists‚ a more in-depth inspection of the gear case may be needed․
The “Bobbing” Issue: Identifying and Fixing Head Movement
The “bobbing” issue‚ where the mixer head moves up and down during operation‚ is a frequent complaint‚ often linked to the head lock mechanism․ KitchenAid mixers have a known issue with these locks‚ frequently revealing themselves after height adjustments․ Inspect the locking levers and their corresponding slots for wear or damage․
Sometimes‚ tightening the head lock nut can resolve the problem․ If the levers are worn‚ replacement is necessary․ Online forums‚ like Reddit’s r/Kitchenaid‚ discuss this extensively‚ and parts are readily available․ Addressing this ensures stable mixing and prevents potential damage․
Gear Case Problems: Recognizing and Addressing Wear
The gear case houses critical components‚ and wear within it can cause significant issues․ Recognizing problems early is key to preventing major repairs․ Symptoms include unusual noises‚ difficulty shifting speeds‚ or the mixer stopping unexpectedly․ A common fault involves stripped gears‚ requiring disassembly and inspection․
Repairing the gear case often necessitates a complete teardown‚ cleaning‚ and lubrication․ Identifying the specific worn gear is crucial for sourcing the correct replacement part․ Professional repair services are recommended for complex gear case issues‚ ensuring proper reassembly and functionality․

Detailed Repair Procedures
This section provides step-by-step guides for common repairs‚ including belt replacement‚ motor fixes‚ and gear case disassembly‚ ensuring successful appliance restoration․
Replacing the Drive Belt
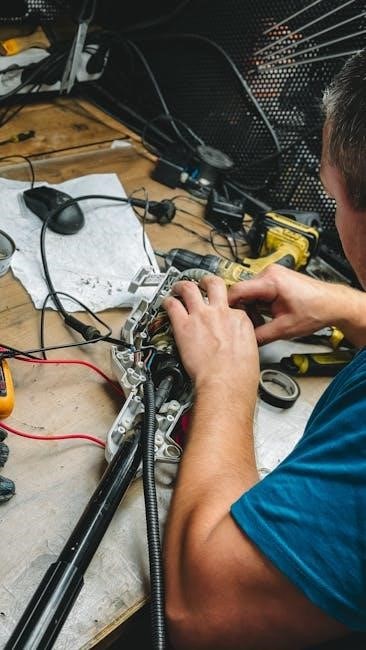
A worn drive belt is a frequent cause of a KitchenAid mixer failing to rotate the bowl‚ even with a humming motor․ Begin by disconnecting the mixer from power – safety first! Remove the bowl lift lever and carefully detach the bowl․ Accessing the belt requires removing the bottom plate‚ typically secured with screws․
Once open‚ locate the old belt stretched around the motor pulley and the worm gear․ Note its routing before removal․ Slide the old belt off‚ then carefully install the new belt‚ ensuring it’s properly seated in the grooves․ Reassemble the mixer in reverse order‚ verifying proper tension before restoring power and testing functionality․ A correctly installed belt will restore smooth bowl rotation․
Fixing the Height Adjustment Lock Mechanism
The height adjustment lock‚ often a source of frustration‚ prevents the mixer head from securely locking into position․ This can manifest as the “bobbing” issue․ Disconnect power before beginning! Access typically involves removing the mixer head’s outer shell․ Inspect the locking lever and its corresponding pawl for wear or damage․
Often‚ cleaning and lubricating the mechanism with food-grade grease resolves minor issues․ If parts are damaged‚ replacement is necessary․ Ensure the new parts are correctly aligned during reassembly․ A properly functioning lock will eliminate head movement during operation‚ providing stable mixing and preventing potential damage․
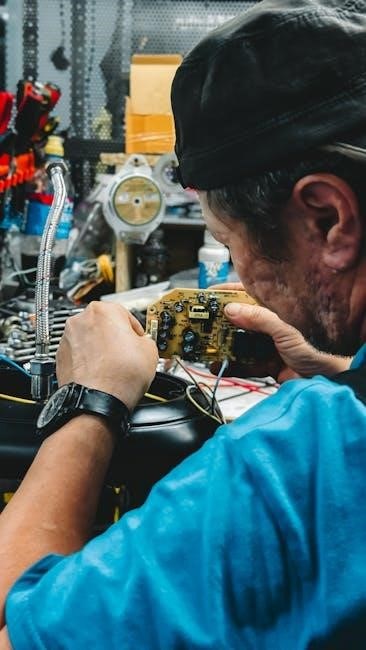
Repairing or Replacing the Motor
Motor issues often present as a humming sound without bowl rotation‚ or complete failure to power on․ Always disconnect power before any motor work! Begin by checking the motor brushes for wear – replacement is a common fix․ If the motor still fails‚ testing with a multimeter can reveal winding continuity problems․
Complete motor replacement is often more practical than attempting complex internal repairs․ Ensure the replacement motor is the correct voltage and horsepower for your model․ Careful wiring and secure mounting are crucial for safe and reliable operation․ Professional assistance is recommended for complex motor repairs․
Gear Case Disassembly and Repair
Gear case problems often manifest as grinding noises or inability to shift speeds․ Disassembly requires careful attention to detail‚ noting gear positions and lubrication points․ Inspect gears for wear‚ stripping‚ or broken teeth – replacement is necessary for damaged components․ Thorough cleaning of all parts is essential before reassembly․
Apply food-grade grease liberally to all gears during reassembly․ Ensure proper alignment and secure fastening of the gear case housing․ Addressing stripped gears promptly prevents further damage․ If unsure‚ professional repair is advisable due to the complexity of this component․
Maintenance and Preventative Care
Regular cleaning and lubrication are vital for a long-lasting KitchenAid mixer‚ preventing issues and ensuring optimal performance for years of baking success․
Regular Cleaning Procedures
Maintaining a clean KitchenAid mixer is paramount for its longevity and performance․ After each use‚ wipe down the exterior with a damp cloth to remove splatters and residue․ Detach and wash the bowl‚ beaters‚ and other attachments with warm‚ soapy water – these are often dishwasher safe‚ but check your model’s manual․ Pay close attention to areas where food can accumulate‚ like around the head tilt-lock lever and the speed control dial․ Avoid abrasive cleaners‚ as they can damage the finish․ Periodically‚ disassemble and thoroughly clean the gear case area (refer to repair sections for guidance)‚ ensuring no grease buildup hinders operation․ A clean mixer is a happy mixer!
Lubrication of Key Components
Proper lubrication is crucial for smooth operation and preventing wear in your KitchenAid mixer․ The gear case is the primary area requiring attention; use KitchenAid’s recommended food-grade grease (or a comparable lithium-based grease)․ Apply grease sparingly during gear case disassembly and reassembly‚ ensuring all gears are adequately coated․ Avoid over-greasing‚ as this can attract dust and debris․ The motor doesn’t typically require routine lubrication‚ but checking the brushes (see related section) is vital․ Regularly lubricating these key components minimizes friction‚ reduces noise‚ and extends the lifespan of your beloved mixer․
Identifying and Replacing Worn Brushes
Worn motor brushes are a common cause of KitchenAid mixer failure․ Inspect the brushes regularly for significant wear – less than ¼ inch remaining indicates replacement is needed․ Accessing the brushes requires motor disassembly‚ so disconnect power first! Carefully remove the old brushes and note their orientation for correct installation of the new ones․ Ensure the new brushes move freely within their housings after installation․ Replacing worn brushes restores motor contact‚ resolving issues like intermittent operation or complete failure‚ and preventing further damage to the armature․
Safety Precautions During Repair
Always disconnect the mixer from power before any repair work․ Handle electrical components with care‚ and utilize appropriate safety gear like gloves and eye protection․
Disconnecting Power Before Repair
Before commencing any repair procedure on your KitchenAid mixer‚ absolutely ensure it is completely disconnected from the electrical power source․ This is the most crucial safety precaution to prevent electric shock or damage to the appliance․ Simply switching off the mixer isn’t sufficient; unplug the power cord from the wall outlet․
Double-check that the cord is fully removed․ If the mixer is hardwired‚ switch off the corresponding circuit breaker in your electrical panel․ A thorough disconnection safeguards against accidental energization during disassembly or component handling․ Remember‚ electricity and repairs don’t mix – prioritize safety first!
Handling Electrical Components
When dealing with electrical components within your KitchenAid mixer‚ exercise extreme caution․ Even after disconnecting power‚ capacitors can retain a charge‚ posing a shock risk․ Avoid touching exposed wires or connectors․ If you’re unfamiliar with electrical work‚ it’s best to consult a qualified technician․
Always use insulated tools to prevent short circuits․ Carefully inspect wiring for damage – frayed insulation or loose connections․ Never attempt to repair damaged cords; replace them entirely․ Proper handling minimizes the risk of electrical hazards and ensures a safe repair process․
Using Appropriate Safety Gear
Prioritize safety during all KitchenAid mixer repair procedures․ Always wear safety glasses to protect your eyes from flying debris‚ especially when disassembling components․ Gloves are recommended to shield your hands from sharp edges and potential contaminants․ A well-lit workspace is crucial for clear visibility and accurate work․
Consider a dust mask if dealing with older mixers that may contain accumulated dust or debris․ Ensure your work area is clean and free of obstructions․ Proper safety gear minimizes the risk of injury and promotes a secure repair environment․
Finding Replacement Parts
Locate genuine KitchenAid parts through official suppliers or reputable third-party retailers‚ ensuring compatibility and quality for successful mixer repairs and continued performance․
Official KitchenAid Parts Suppliers
KitchenAid’s official website is the primary source for authentic replacement parts‚ guaranteeing a perfect fit and maintaining your mixer’s warranty․ Authorized KitchenAid parts distributors also offer a wide selection‚ often providing expert advice to help you identify the correct component․ These suppliers prioritize genuine KitchenAid quality‚ ensuring durability and optimal performance․
While potentially more expensive than third-party options‚ using official suppliers minimizes the risk of compatibility issues and ensures you’re receiving parts designed specifically for your KitchenAid model․ Always verify the supplier’s authorization status before making a purchase to avoid counterfeit or substandard components․
Third-Party Parts Retailers
Numerous online retailers specialize in appliance parts‚ offering KitchenAid mixer components at potentially lower prices than official suppliers․ These retailers often carry both genuine KitchenAid parts and compatible aftermarket alternatives․ Popular platforms include Amazon‚ eBay‚ and dedicated appliance parts websites․
However‚ exercise caution when purchasing from third-party retailers․ Carefully review product descriptions‚ seller ratings‚ and return policies to ensure quality and compatibility․ Verify the part number matches your mixer’s model before ordering‚ and be aware that aftermarket parts may not meet the same standards as genuine KitchenAid components․
Identifying the Correct Part Number
Accurate part identification is crucial for successful repairs․ The part number is typically found on the original component itself‚ or within your KitchenAid mixer’s model documentation․ Locate the model number‚ usually on a plate affixed to the mixer’s base or within the bowl lift mechanism․
Once you have the model number‚ consult the KitchenAid parts diagram (available on their website or through retailers) to pinpoint the correct part number for your specific need․ Double-check compatibility before ordering‚ as even slight variations can prevent proper fit and function․
Advanced Troubleshooting
Complex issues require in-depth diagnosis‚ potentially involving electrical testing‚ gear inspection‚ and wiring analysis for optimal KitchenAid mixer performance․
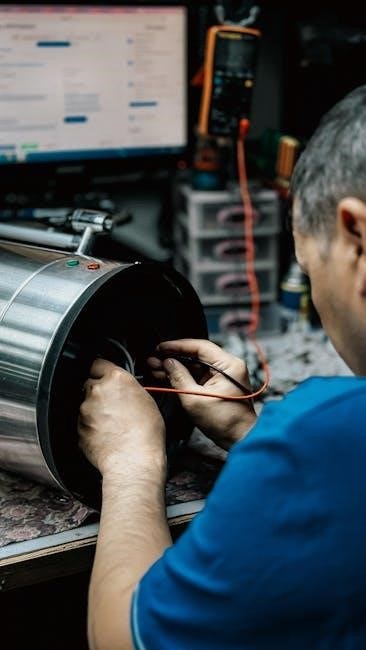
Diagnosing Complex Electrical Issues
Electrical faults within a KitchenAid mixer demand a systematic approach․ Begin by carefully inspecting the wiring for any signs of damage‚ such as fraying or burning․ Utilize a multimeter to test continuity and voltage levels across key components‚ including the motor windings and power switch․
Pay close attention to the capacitor and diode‚ as failures here are common․ If you suspect a short circuit‚ isolate sections of the wiring to pinpoint the source․ Remember to always disconnect the power before undertaking any electrical diagnostics․ Complex issues may necessitate a schematic diagram for accurate tracing and identification of faulty components․ Professional assistance is recommended if you lack experience․
Addressing Stripped Gears
Stripped gears within the KitchenAid mixer’s gear case often result from excessive load or prolonged wear․ Identifying the damaged gear requires careful disassembly and inspection․ Replacement is typically the only viable solution‚ as repairing stripped teeth is rarely successful․
Ensure you obtain the correct replacement gear for your specific mixer model․ During reassembly‚ apply a generous amount of food-grade grease to all gear surfaces to minimize future friction and wear․ Consider the cause of the stripping – overloading the mixer repeatedly will lead to recurrence․ A professional repair might be needed for complex gear case issues․
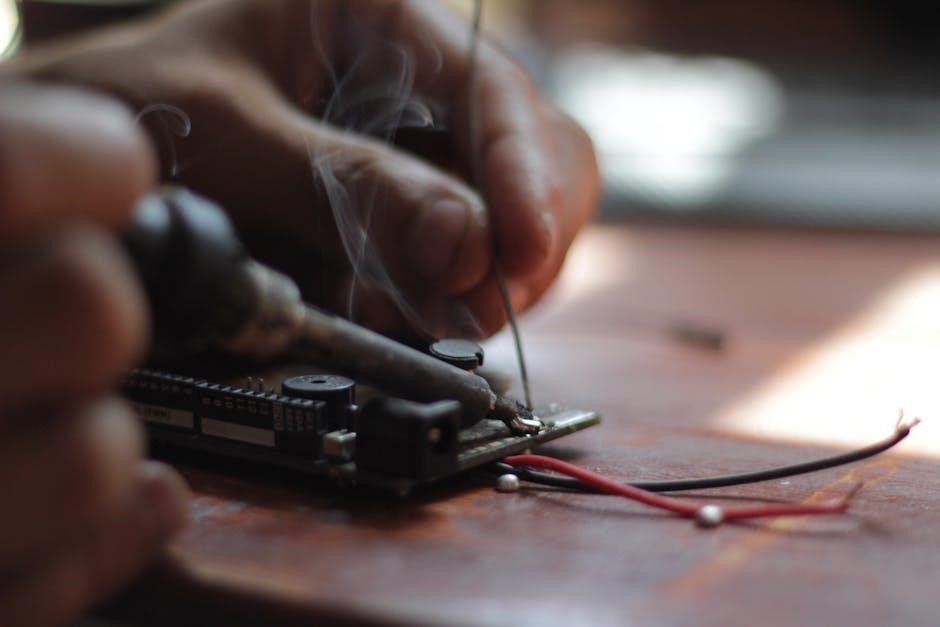
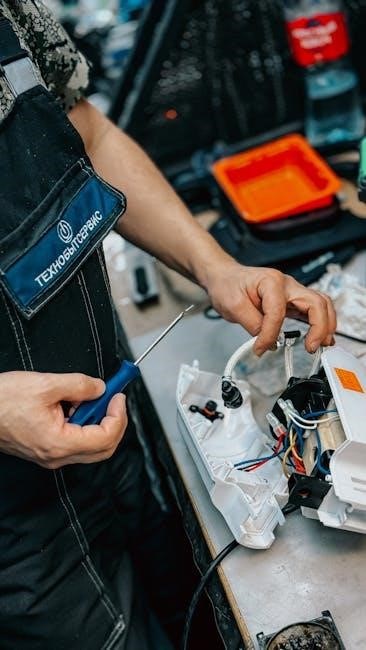
Dealing with Internal Wiring Problems
Internal wiring issues within a KitchenAid mixer can manifest as intermittent operation or complete failure․ Before attempting any repair‚ always disconnect the power supply․ Carefully inspect the wiring for frayed insulation‚ loose connections‚ or burnt components․ Use a multimeter to test for continuity and shorts․
Replacing damaged wires requires precise soldering skills and knowledge of the mixer’s wiring diagram․ If you’re uncomfortable working with electrical components‚ seeking professional assistance is crucial for safety․ Incorrect wiring can create fire hazards or further damage the appliance․

Resources and Further Help
For additional support‚ explore the KitchenAid website‚ online repair forums like Reddit’s r/Kitchenaid‚ or consider professional repair services for complex issues․
KitchenAid Support Website
The official KitchenAid website is an invaluable resource for mixer owners seeking repair assistance․ It provides access to a comprehensive library of documentation‚ including detailed user manuals‚ parts diagrams‚ and troubleshooting guides specifically tailored to various KitchenAid mixer models․ You can often find answers to frequently asked questions and explore instructional videos demonstrating common repair procedures․
Furthermore‚ the website offers a direct line to KitchenAid’s customer support team‚ allowing you to submit inquiries‚ request assistance with part identification‚ or schedule a service appointment if self-repair proves challenging․ Utilizing the website’s resources can often resolve minor issues quickly and efficiently‚ saving both time and expense․

Online Repair Forums (e․g․‚ Reddit r/Kitchenaid)
Online repair forums‚ such as the Reddit r/Kitchenaid community‚ offer a collaborative platform for KitchenAid mixer enthusiasts and repairers․ These forums are brimming with shared experiences‚ troubleshooting tips‚ and detailed repair tutorials contributed by fellow users․ You can often find solutions to specific problems‚ identify common issues with particular models‚ and gain insights into effective repair strategies․
Moreover‚ these communities provide a space to ask questions‚ share photos of your mixer’s issues‚ and receive guidance from experienced members․ The Reddit forum specifically mentioned demonstrates active discussion regarding bobbing issues and repair options‚ showcasing the value of peer-to-peer support․
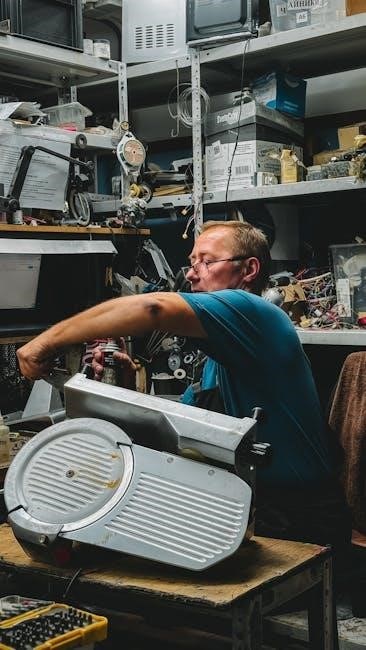
Professional Repair Services
When DIY repairs prove too complex or risky‚ seeking professional KitchenAid mixer repair services is a prudent choice․ Qualified technicians possess the expertise and specialized tools to diagnose and address intricate issues‚ ensuring a safe and effective repair․ These services are particularly valuable for complex electrical problems‚ stripped gears‚ or internal wiring concerns․
While self-repair can be cost-effective‚ professional services offer peace of mind and guarantee quality workmanship․ Resources like Repair it Reuse it highlight the importance of knowing when to defer to professionals for safety and optimal results‚ especially when dealing with potentially hazardous components․